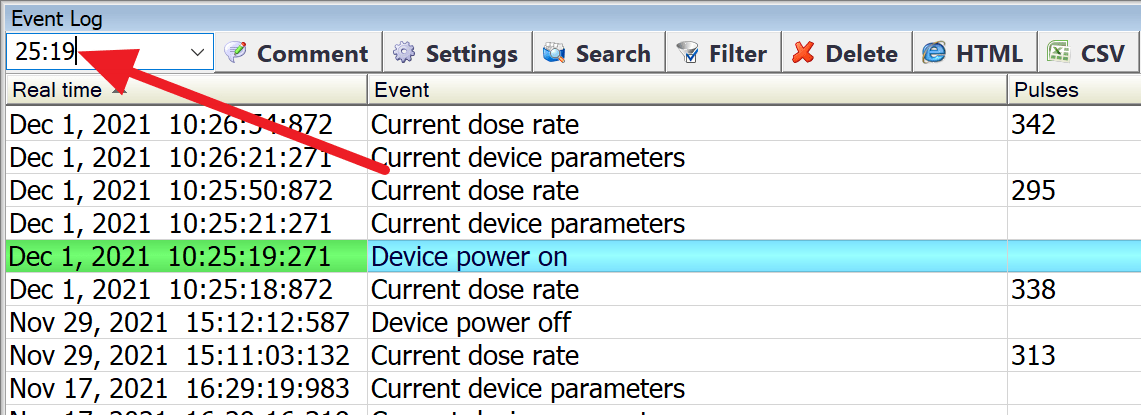
Event log
This window is designed to interface with the device log database. Use it to view and delete event and measurement records, conduct searches, export measurement data, and perform other operations.
The list shows only the records of the device whose serial number is selected in the dropdown list on the control bar of the RadiaCode home window. Keep this in mind if you are working with more than one instance of RadiaCode-10X.
When the device is connected to the computer, the program automatically retrieves the accumulated log entries from the device, displaying them in the window. The records retrieved from the device are then deleted from it.
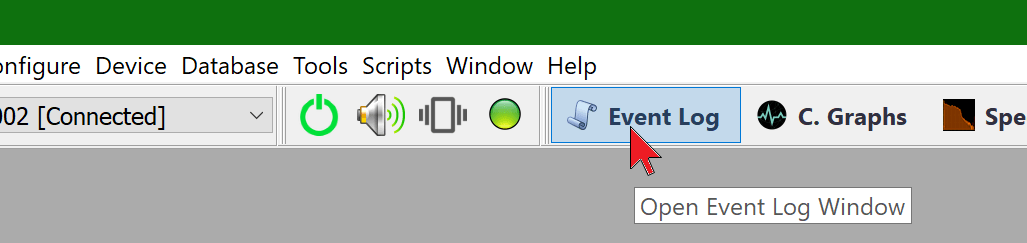
To quickly switch to the Journal window, click its button on the control bar of the RadiaCode home window:
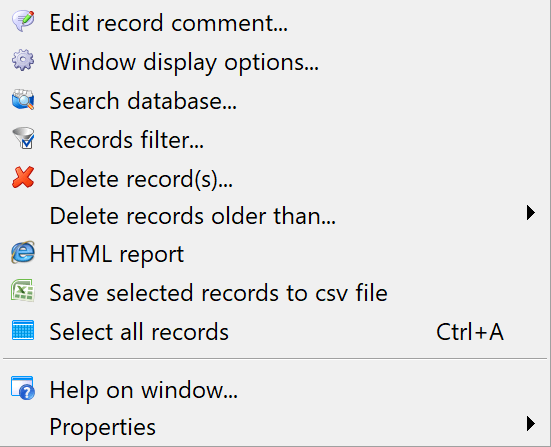
The most commonly used window-related commands can be executed using the buttons on the window control bar. You can access the full list of commands by opening the window's local menu through a right-click within the window:
The window displays information in a table format. The right panel shows the details related to the line selected in the left panel.
To rearrange the columns in a table, you can drag them left or right behind the column title. The local menu command “Window display options” or the “Settings” button opens a dialog where you can choose which columns to display in the window and in what order.
The information in the window is sorted by the contents of one of the columns. To change the column being sorted, click on its title. Click again to reverse the sort order.
Some window commands allow you to work with multiple selected records. To select multiple entries, click on them while holding down the Ctrl or Shift key, as is common in the Windows interface.You can use the Ctrl+A key combination to select all entries.
A quick search box is located on the left-hand control bar of the log window. When you click on this box and begin typing, the window will show a line containing this text in any of the columns:
If the entered string is absent in all fields of the database, the background of the search field will turn pink.
To the right of the Quick Search field is a field for selecting the serial number of the device, whose records will be displayed in the window. This field is useful if the database contains records from different instances of the RadiaCode-10X. You can choose to display records from one specific device or all devices.
Window command
Edit record comment
Set or modify a custom comment for the current entry or for all selected entries:

Comments appear in the log window under the “Comment” column and are also exported to .html and .csv files, which are generated by the corresponding window commands.
If multiple records are selected, the check mark at the bottom of the comment window indicates whether to apply the comment to all selected records or just the current one.
Display settings
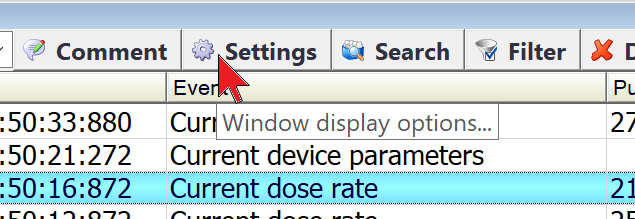
By using the “Settings” button on the window control bar, you can determine which fields are displayed in the window and their order:
The “Database window display options” dialog box opens:
The fields marked with a checkmark in the list are displayed in the window. By using the “Move up” and “Move down” buttons, you can control the order of the fields in the window: the higher a field is in the list, the further to the left it will appear in the window. Use the Ctrl and Shift keys to select more than one field at a time.
You can also rearrange the fields in the table directly within the window by dragging the field titles with the mouse.
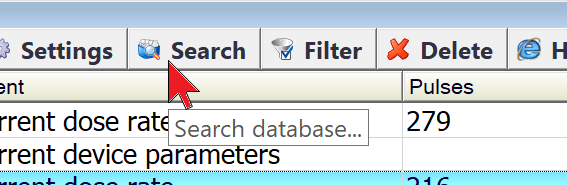
Search database
Use this function to perform an advanced search for data in the database. To search, click the “Search” button on the window control bar:
A dialog box opens, allowing you to set the search conditions and how the results are displayed:
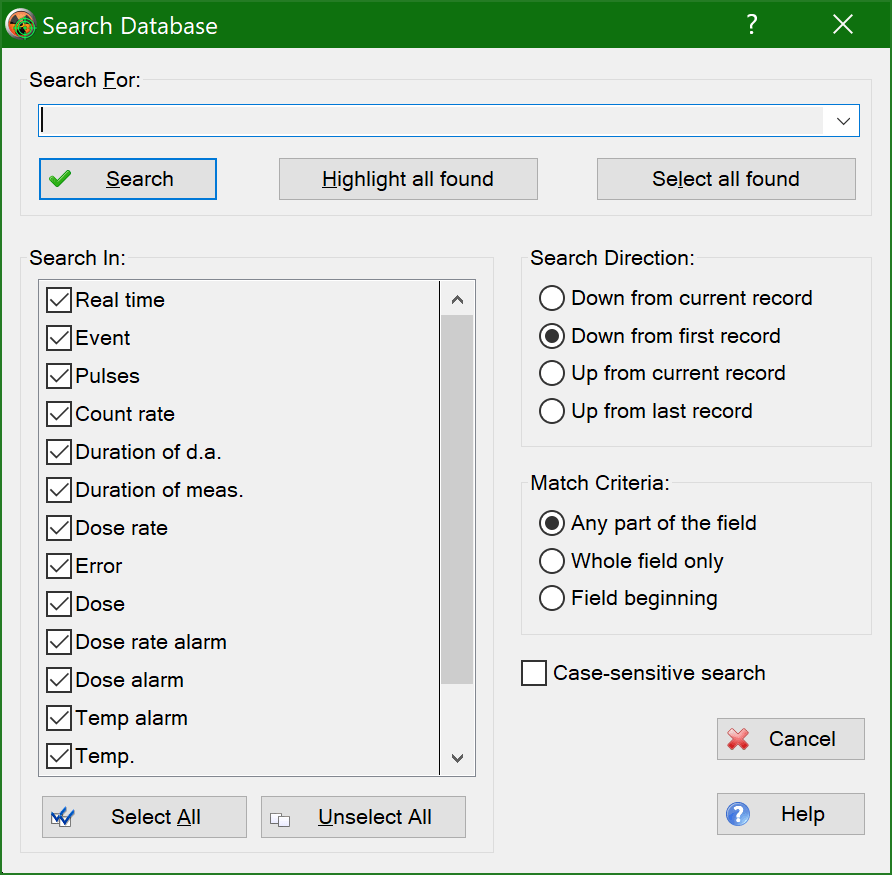
- In the “Search for” field, enter a substring to search for.
- In the “Search in” list, indicate where to search for the entered row.
- In the “Search direction” list, specify the direction for the search.
- In the “Match criteria” list, select how the search string argument should be compared to the contents of the field.
- If the “Case-sensitive search” option is enabled, uppercase and lowercase letters are considered different when comparing.
To initiate a search, click the “Search”
The “Highlight All Found” function searches and highlights all fields that meet the search criteria with a green background:
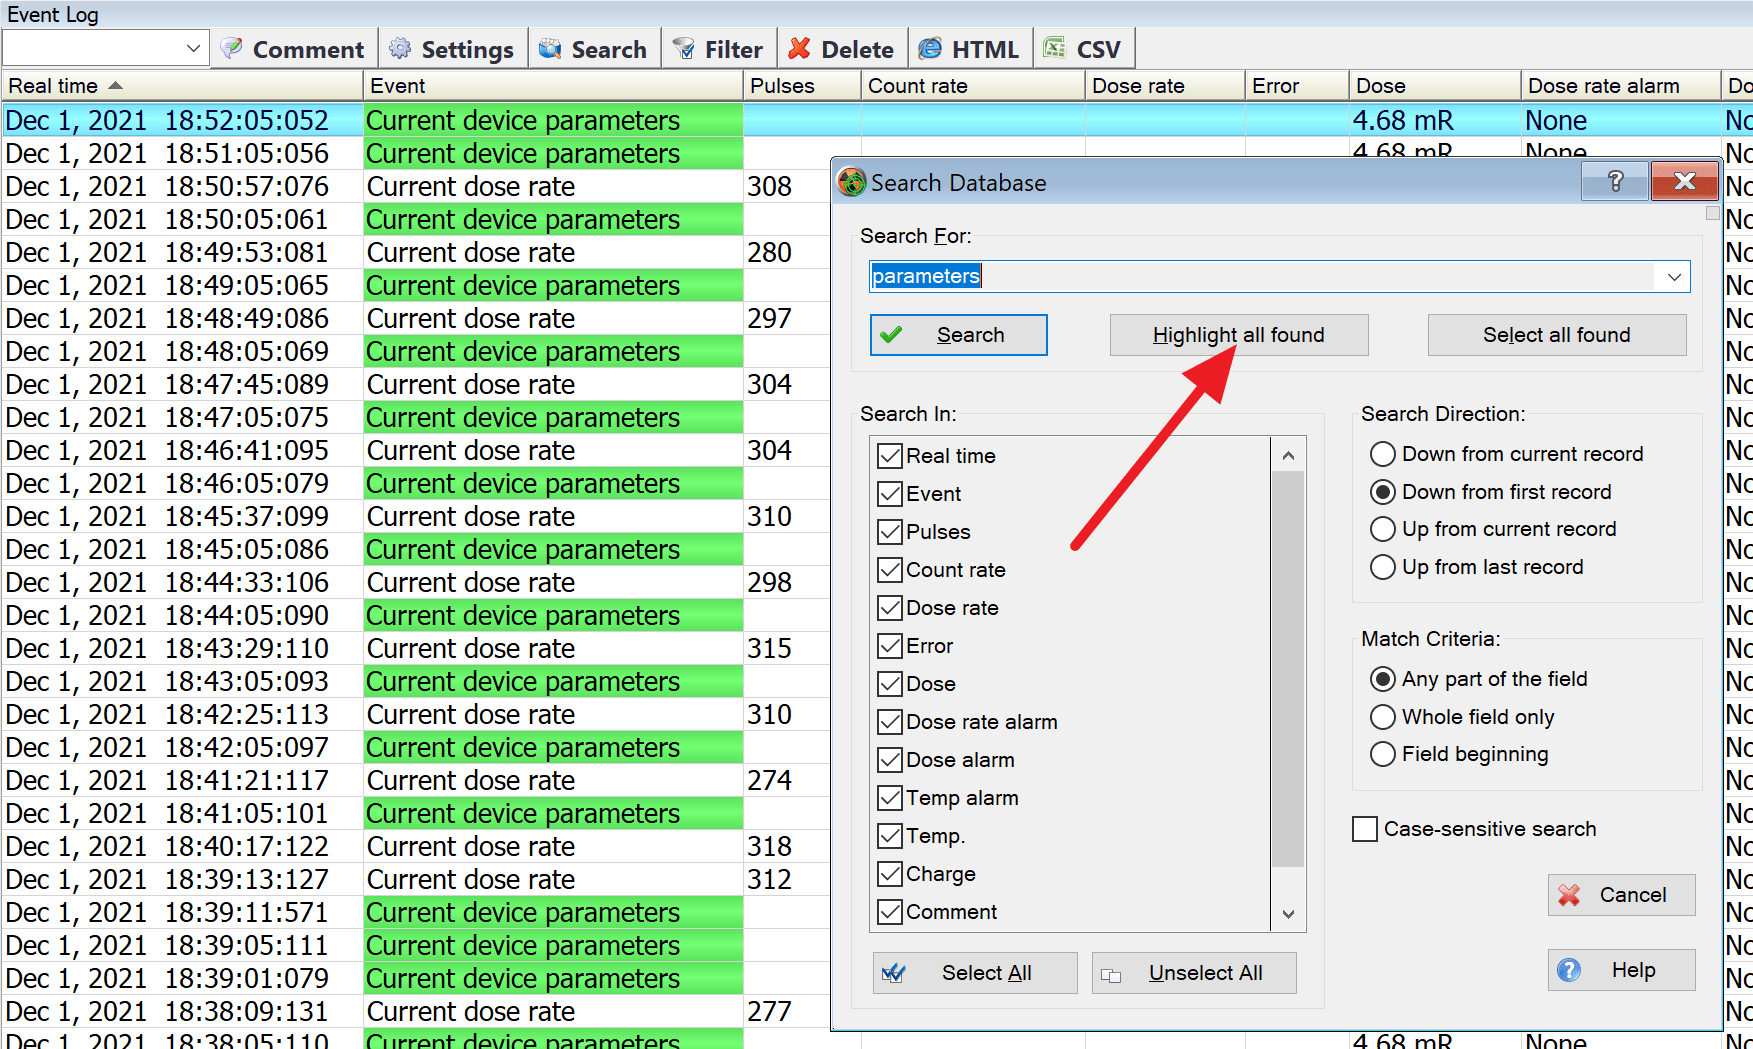
The “Select All Found” function searches and highlights all lines containing fields that meet the search criteria:

You can then perform a group operation with the marked entries, such as deleting them or saving them as a table in an HTML file.
Records filter
The record filter is an advanced function that allows you to display only those records in the window that meet specified conditions. For example, you can set the filter to show only measurement records with alarms made between certain dates.
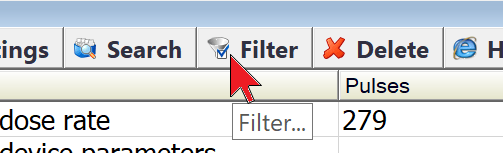
To set the filter conditions, click the “Filter” button on the window control bar:
The "Database filter settings" dialog box opens:
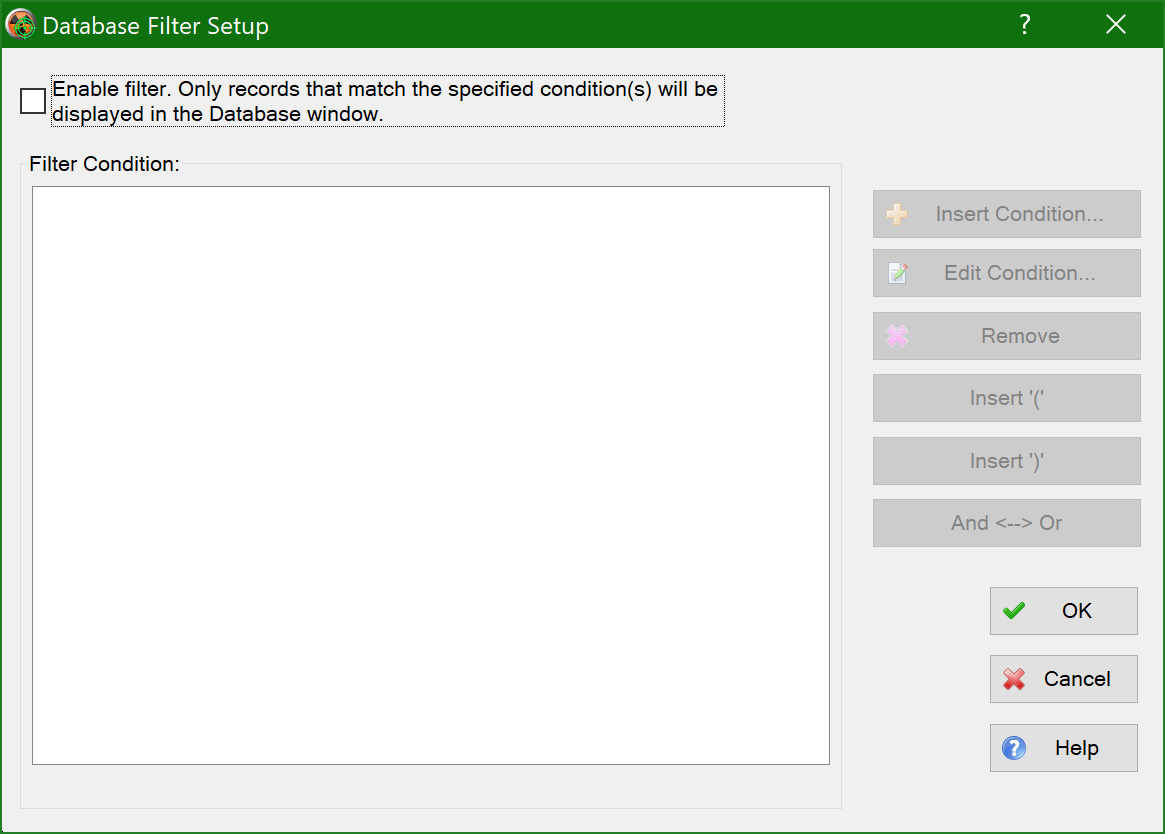
Enable the filter. The “Insert condition” and other buttons to the right of the “Filter condition” field will become available.
The “Insert condition” button opens a dialog box where you can set a filter condition:
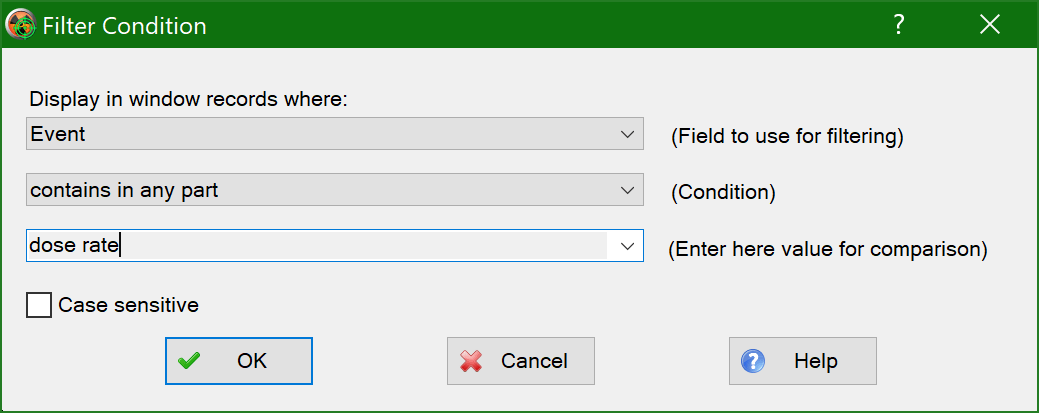
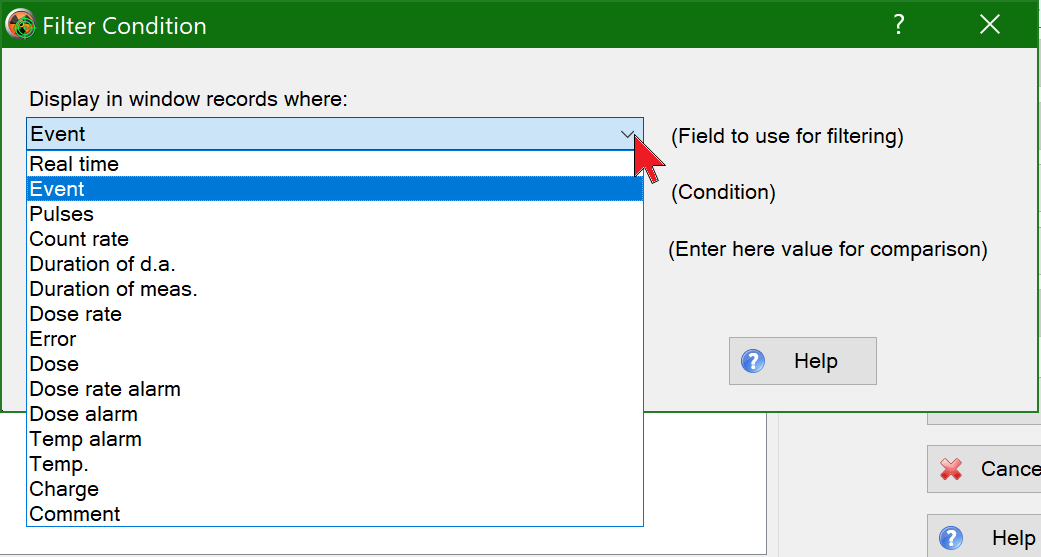
At the top, you can set the database record field to be filtered. To do this, click the arrow to the right of the field. Only the fields that appear in the window will be listed. The configuration of the window view is described in the “Display settings.”
Next, specify the condition to be used for filtering. The list of conditions depends on the field type: for text fields, it will be as shown in the picture below; for numeric fields, you can specify the value; for date fields, select the date and time.
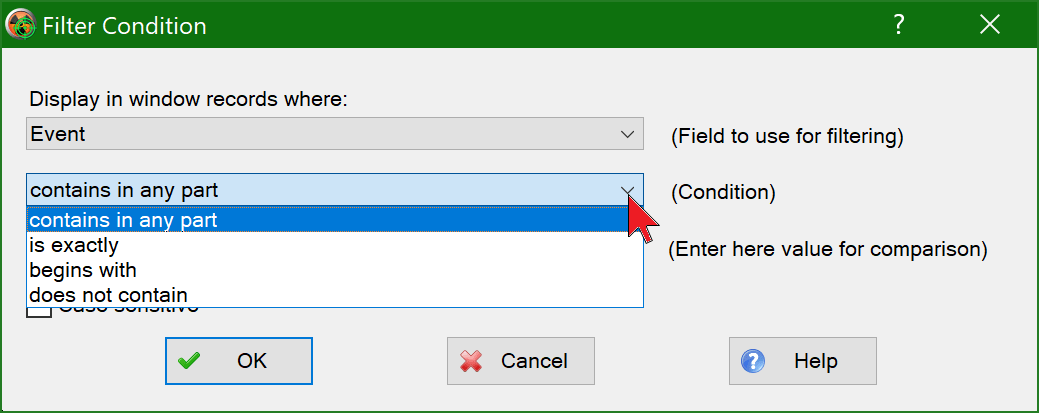
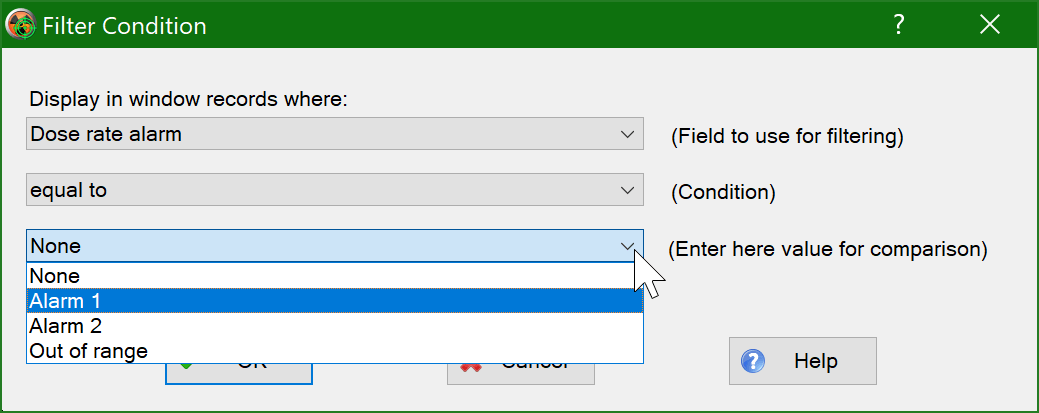
In the bottom entry field, which also depends on the type of database field selected for filtering, you should enter or select from the suggested list what its contents are compared with:
Click the “OK” button. The condition will be added to the list of conditions:

If you add more conditions in a similar manner, the list of conditions might appear as follows:
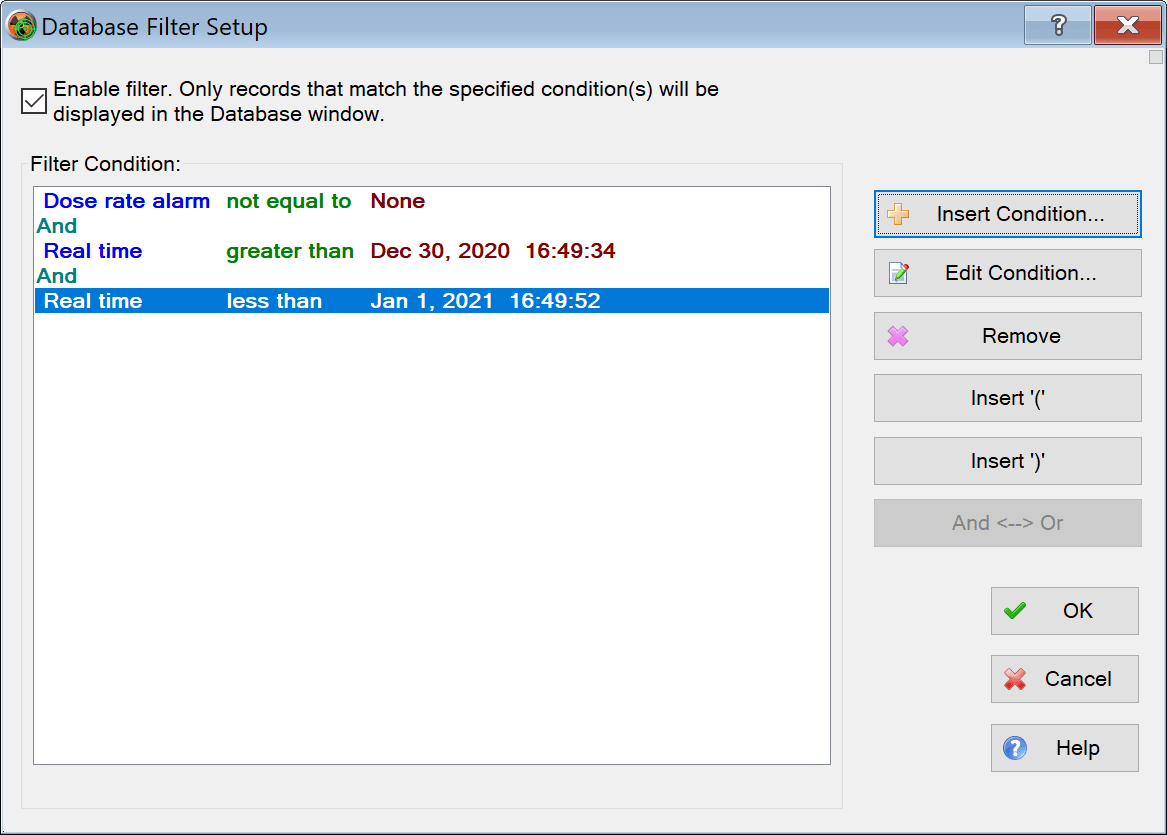
As you might easily guess, the three conditions entered are connected by “AND”, meaning records that meet all three conditions simultaneously will be displayed in the window. To switch from “AND” to “OR”, click on the line with the word “AND” in the list on the left, and then click on the “AND” <--> “OR”. Now, the condition is that the window will display entries that satisfy the first condition and at least one of the second or third conditions.
If there are many conditions, you may need to prioritize comparison operations. For this purpose, use the buttons “Insert ')'” and “Insert '('” to insert brackets in the conditions.
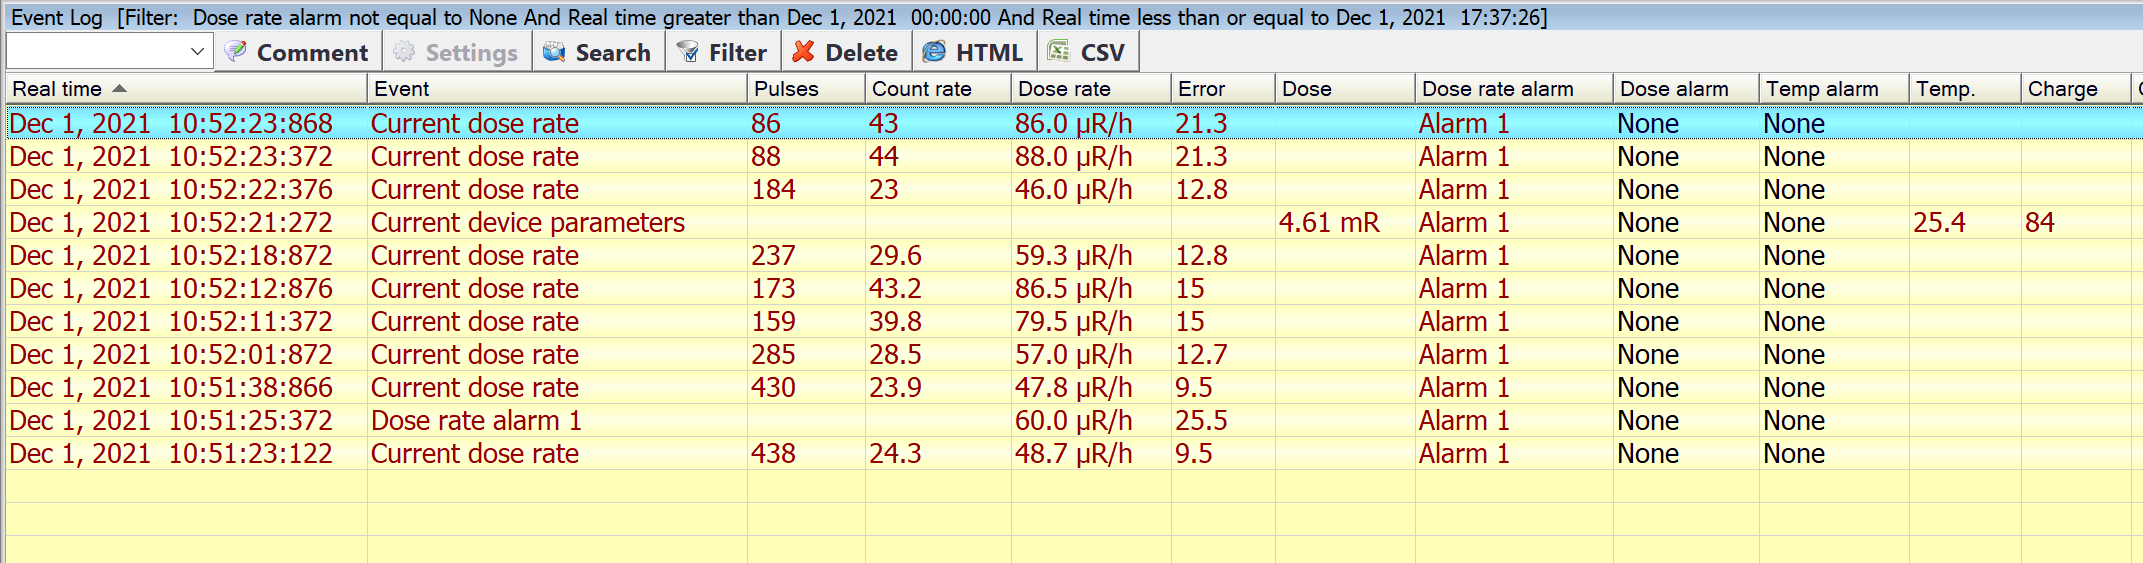
When the filter is enabled, all window entries are highlighted with a yellow background to remind you that the filter is active. The filter condition is displayed in the window title:
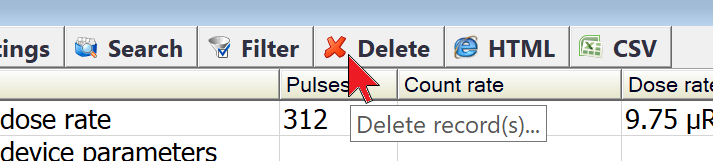
Delete record(s)
To delete a record, select it in the window to make it the current entry, then click the “Delete” button on the window's control bar.
A prompt appears to confirm the deletion.
Multiple selected entries can be deleted simultaneously.
Delete records older than...
This command can be accessed through the context menu, which is opened by right-clicking:
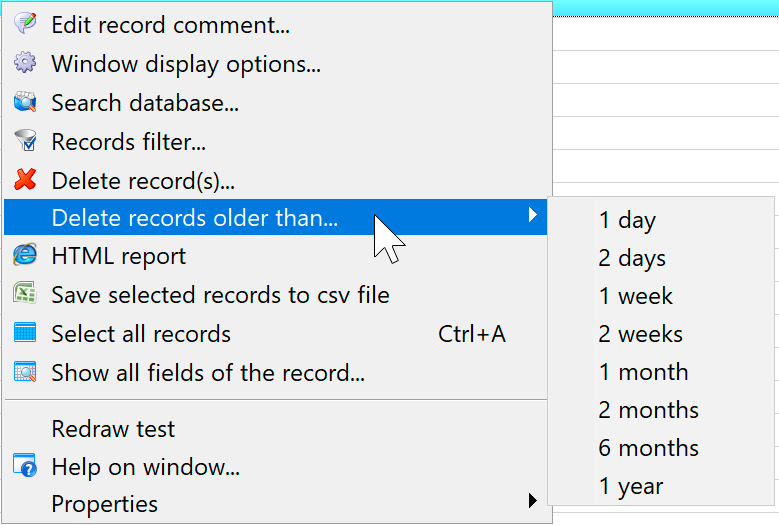
After confirmation, records with dates older than the selected one in the list are deleted from the database.
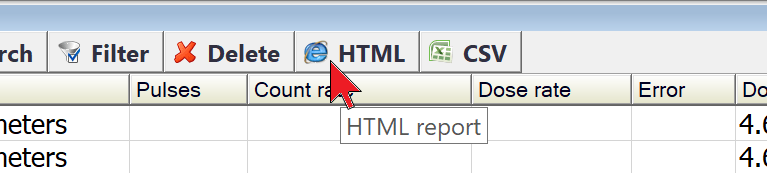
HTML report
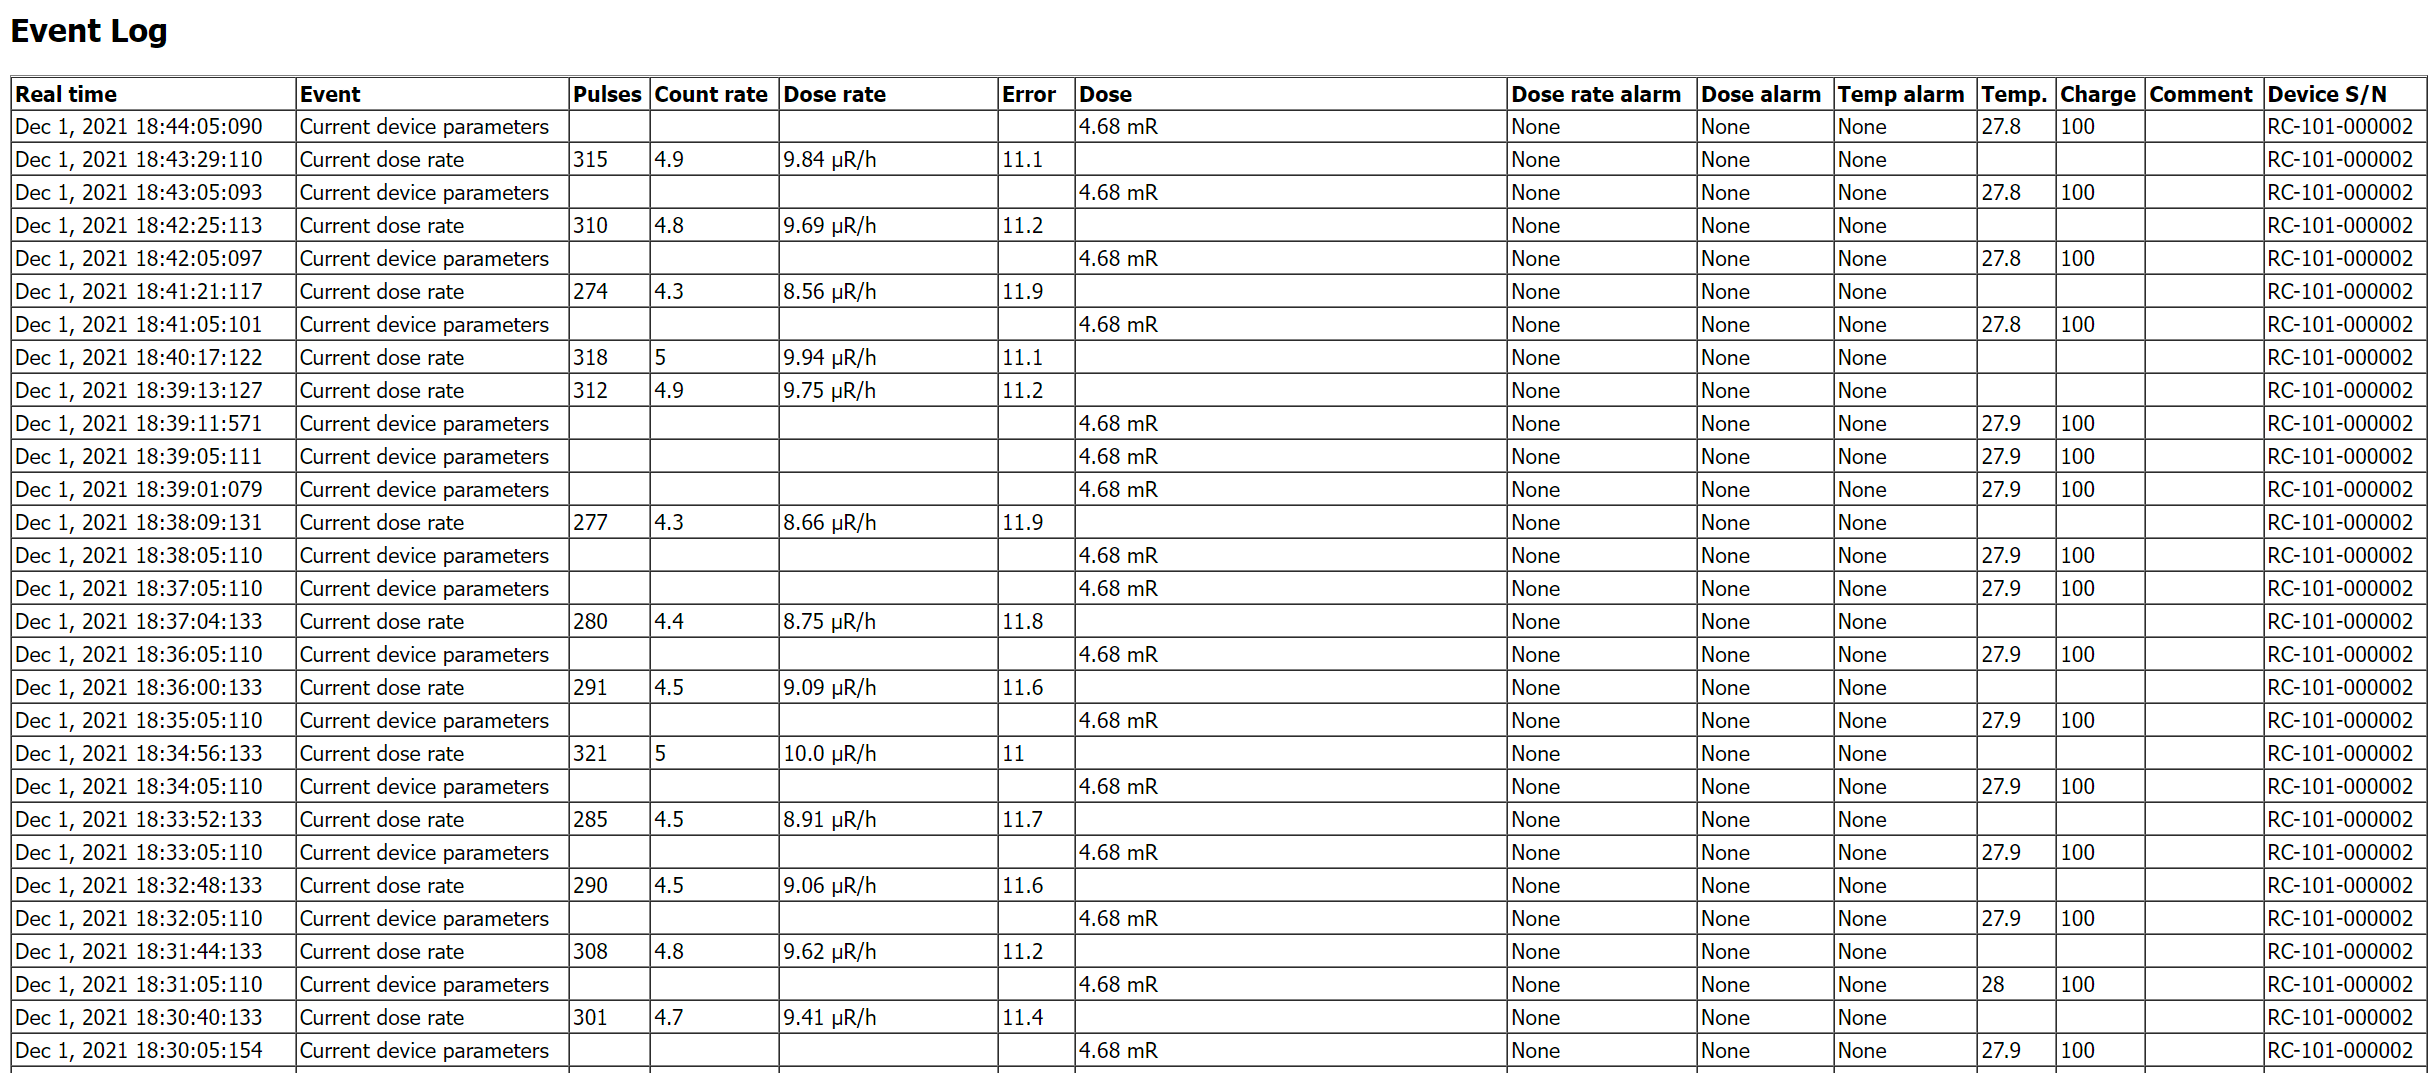
Use this function to save the log as a table in an HTML file. The saved HTML file can then be downloaded to Microsoft Word or Excel for editing, printed, or emailed.
To execute the command, click the “HTML” button on the window control bar:
If multiple records are selected in the window (using Ctrl and Shift), only those records will be saved. If no records are selected, all logs will be saved in the HTML file.
Only the fields that are displayed in the window at the time the command is executed are saved, and they are saved in that order. The configuration of the window view is described in the "Display settings."
This will open a dialog where you need to specify the name of the HTML file to be saved. Here is an example of a table in an HTML file:
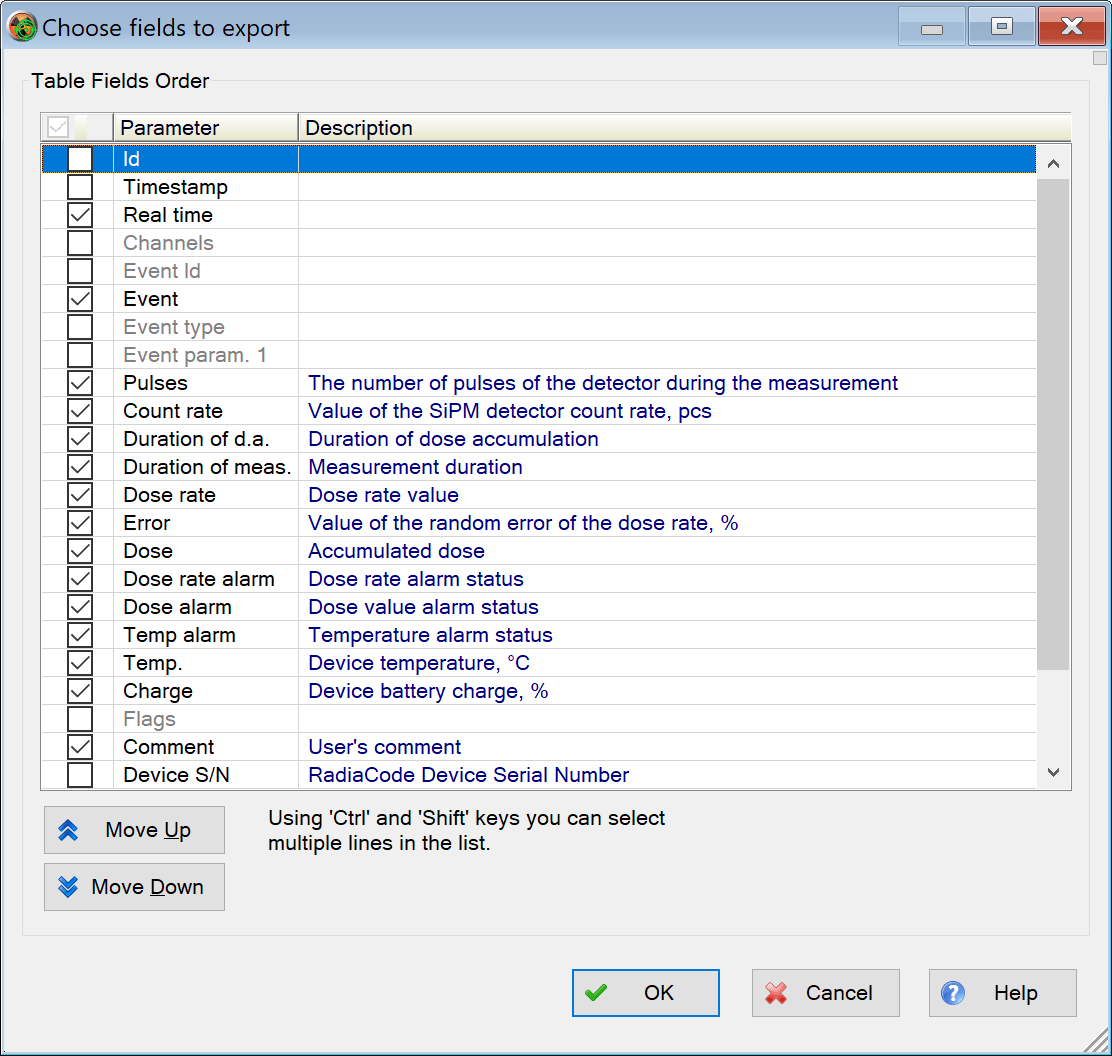
Save the selected records to an Excel CSV file
Use this function to save selected log entries in a .csv file for later analysis in Excel.
To execute the command, click the “CSV” button on the window control bar:
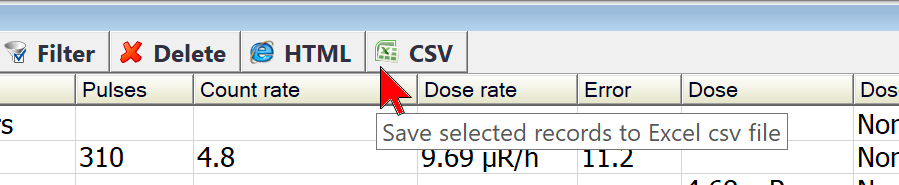
Only the selected records are saved in the .csv file (use Ctrl and Shift to select records). If nothing is selected, only the current entry is saved in the .csv file.
Before saving, you can choose which table fields to save and in what order:
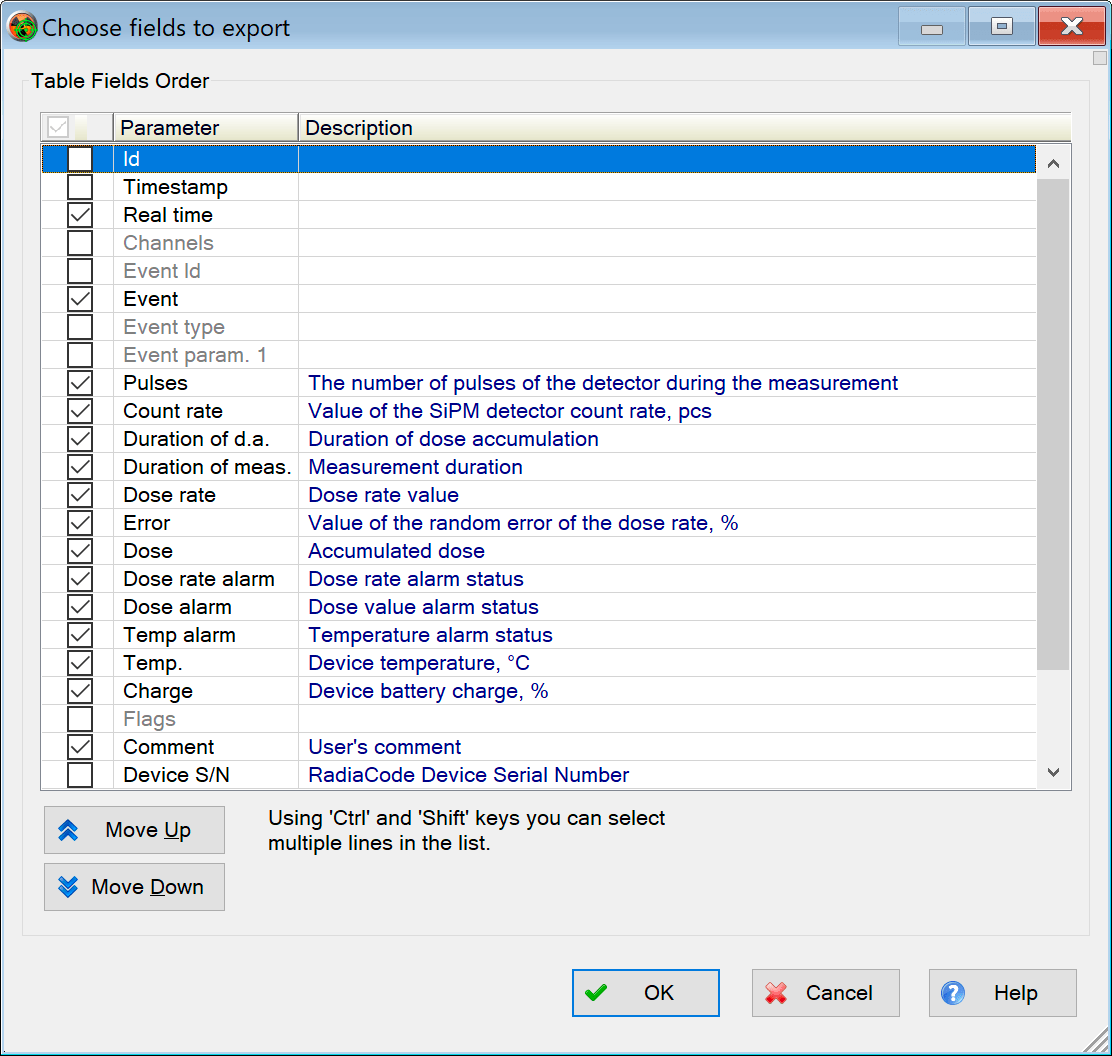
In addition to the visible table fields, the .csv file stores the measurement parameter values in "raw" format, meaning in a numerical format accepted by Excel. This allows for the analysis of measurement results and the creation of graphs using Excel tools.
To simplify searching and selecting entries, a record filter can be used.
Updated: Jan 8, 2026