Overview
Map & Tracks Overview
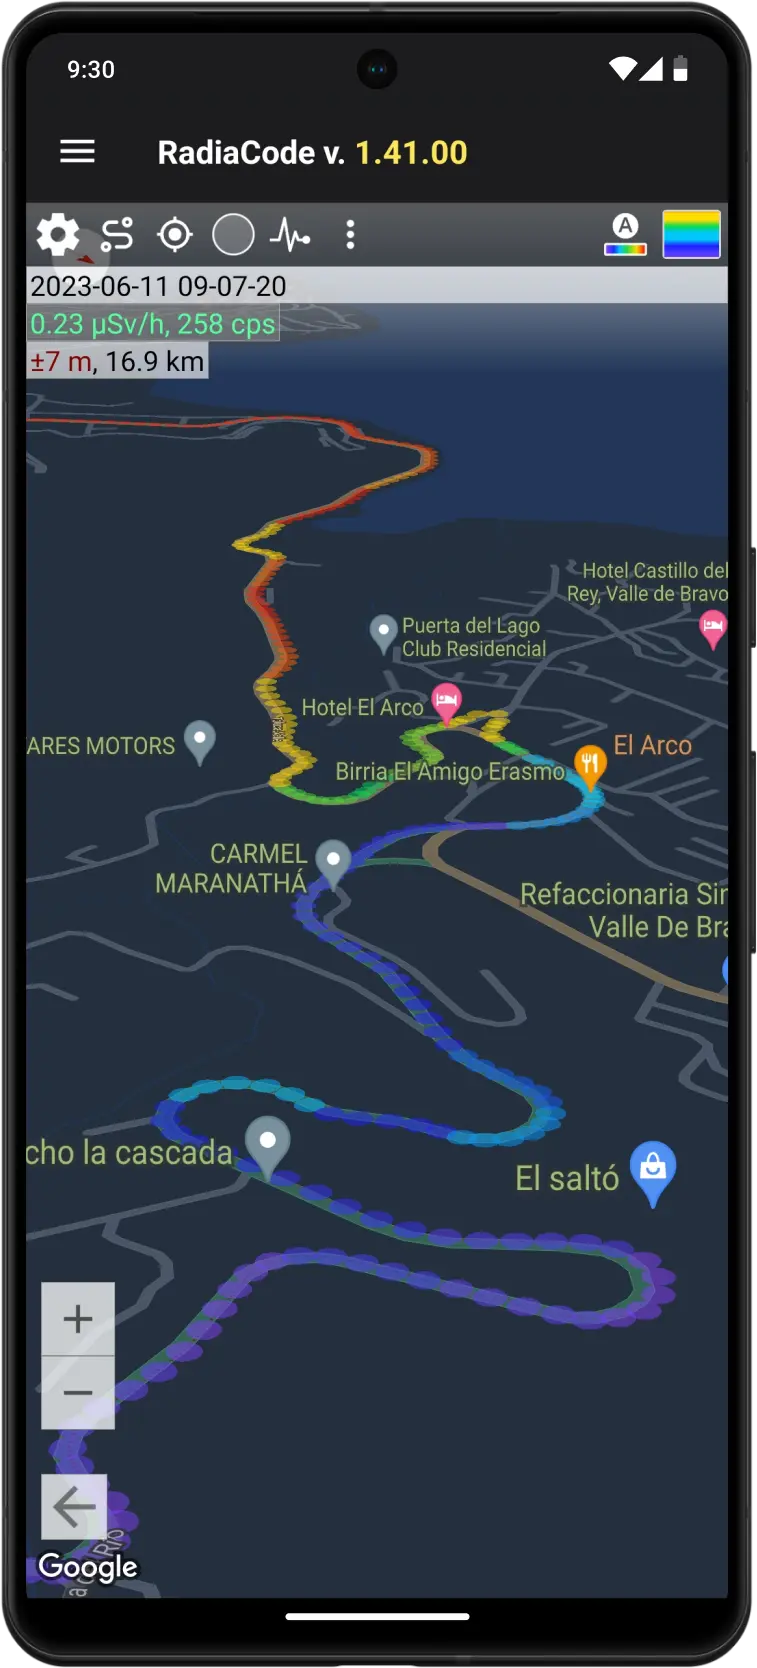
The Radiacode Android application is equipped with features for displaying the emission situation on a map in real time, as well as functions for recording routes ('tracks') and downloading them for viewing.
To access the map, select the “Map” option in the main menu, which you can open by tapping the  icon at the top left.
When opening the map, automatic positioning to the current location is not performed because this operation requires activating the smartphone's GPS module.
To record tracks, the app requires access to the device's location. For the app to record tracks in the background, it needs permission to access the location in any mode. If you do not grant this permission, track recording will be interrupted when switching to another application.
Location services must be enabled on your smartphone to record tracks.
| Button | Description |
|---|---|
| Opens the map-related settings. |
| Opens track library. |
| Displays a point in the center of the map that corresponds to your current location. A long tap on this icon also sets an average map scale. When opening the map, automatic positioning to the current location is not performed, as this operation requires activating the smartphone's GPS module. |
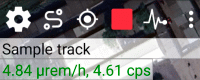
| Starts or continues recording a track. |
| Indicates that marker colors are determined by dose rate values. When clicked, it switches to the mode of marker coloring by count rate, and the icon on the button is replaced by this:
|
| Opens the drop-down menu:
|
| Automatically colors markers on the map according to the minimum and maximum dose rate/count rate values. A long tap also automatically sets the minimum and maximum values for the displayed markers. |
| Expands or hides the color bar graph. |


Tracks
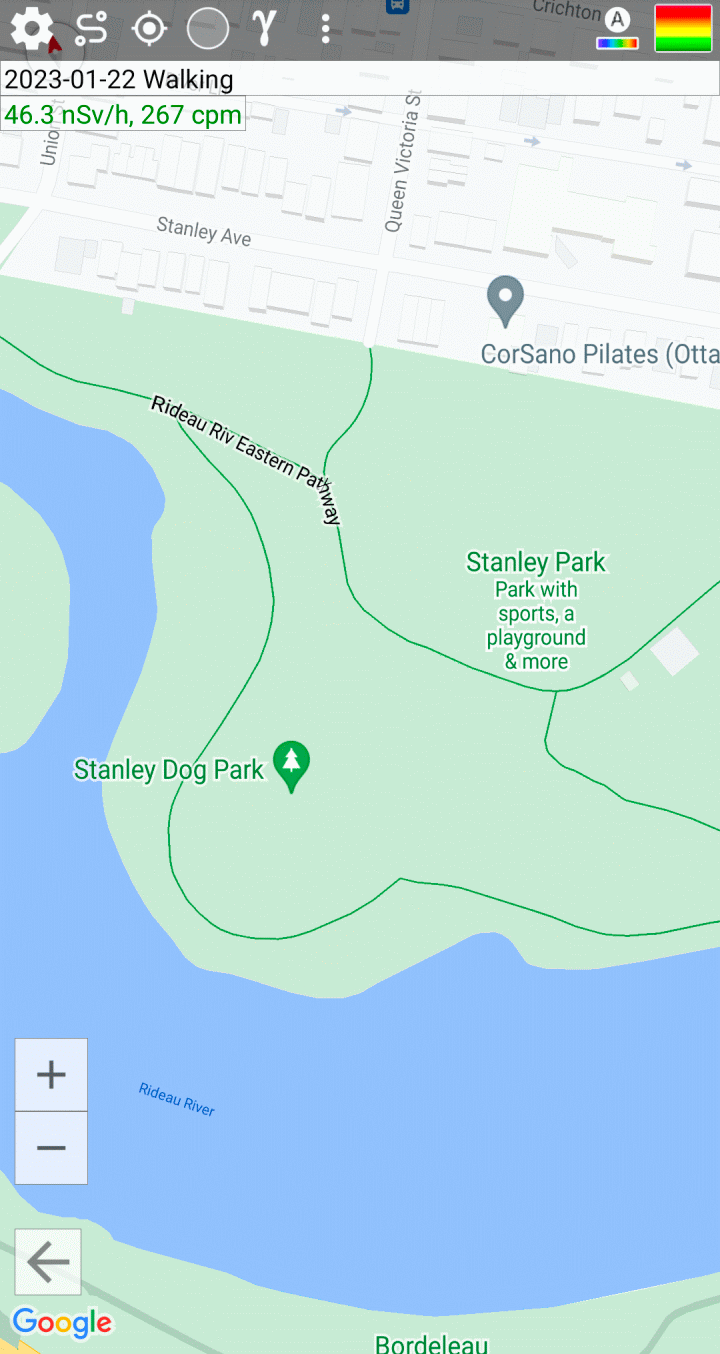
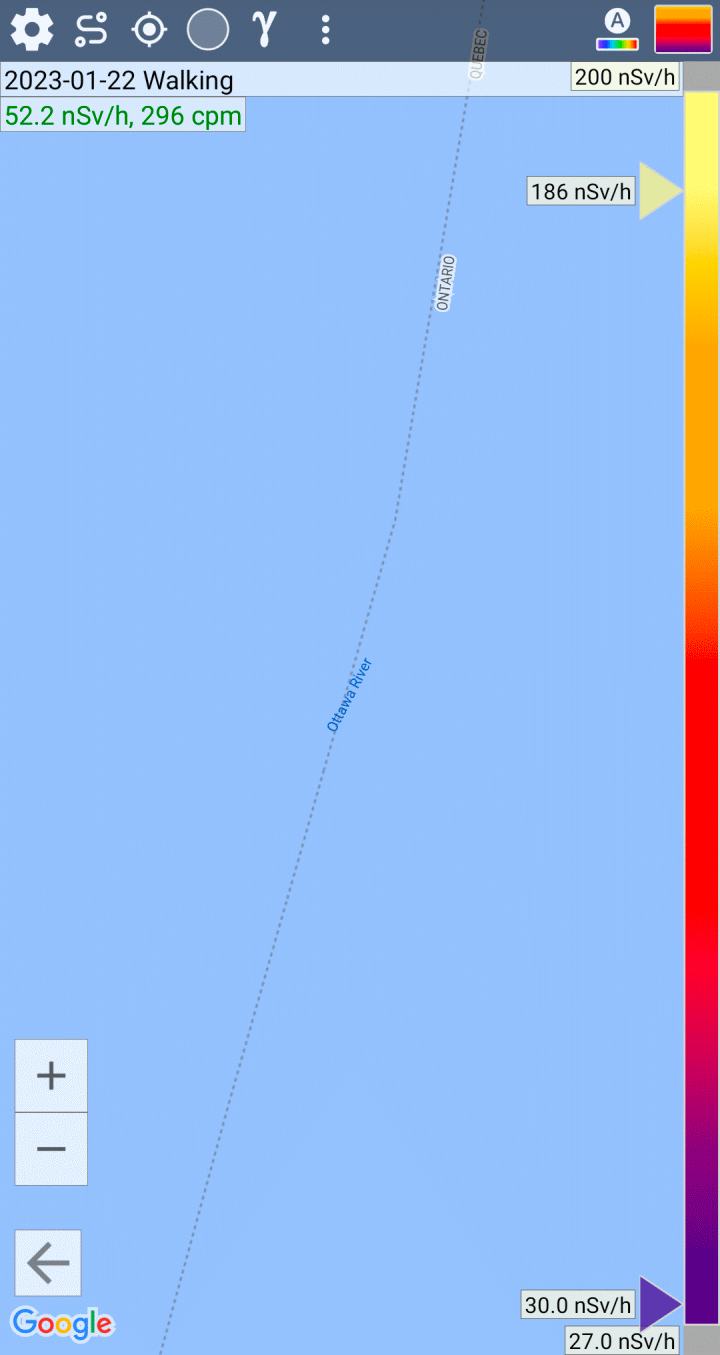
When you record a track, each current location is marked with a circle on the map. The color of the circle corresponds to the emission level or count rate measured at that point, based on the color settings of the color scale.
The colors of the markers are determined by the dose rate values or, starting with application version 1.30.00, by the count rate values. The display mode is selected using the corresponding button on the toolbar. Tracks recorded with older versions of the software do not contain count rate information, so marker colors will appear the same in both modes. Tracks recorded by a device whose firmware did not yet support energy compensation essentially contain dose rate values that are directly proportional to the count rate.
To begin recording a track, tap the icon  located at the top left of the screen. You will be prompted to enter a track title. Once entered, recording will commence, and the track name will appear at the top of the screen beneath the buttons:
New points appear on the map and are recorded in the track only when the location changes. In the application settings, you can set the minimum position accuracy. Keep in mind that the accuracy of location determination depends on many factors, such as the quality of the phone's GPS module and interference. If information from the GPS sensor is unavailable, the smartphone can determine the location using other sources, like cell towers and Wi-Fi networks.
When first displayed on the map in dose rate mode, the marker is colored according to the current dose rate value transmitted by the device and is surrounded by a thick gray line. The operational dose rate value transmitted by the device lags behind the current calendar time. The lag time depends on the rate of change in the radiation situation: with small changes in dose rate values, the lag can be tens of seconds; with sharp changes, the lag is reduced. As data arrives from the device, operational markers corresponding to the calendar time of the received values are repainted to match the accepted value and become permanent, causing the thick stroke to disappear. You can turn off the thick outline of operational markers in the map settings. Hot markers are not stored in the database.
Track recording continues until it is explicitly stopped and as long as the application maintains communication with the device. When the device is reconnected, track recording resumes automatically.
Keep in mind that in track recording mode, the smartphone consumes a lot of energy, causing the battery to drain faster. If it's not necessary, avoid setting the positioning accuracy too low in the application settings.
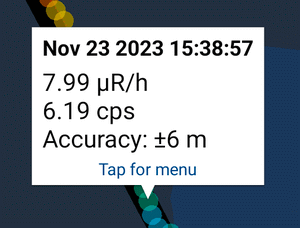
If you tap any circle (marker), information related to this point will be displayed: date/time, measured emission level, count rate, and positioning accuracy.
Tapping the information window opens a drop-down menu, allowing you to attach a picture to the point, remove the point from the track, or simply close the information window.
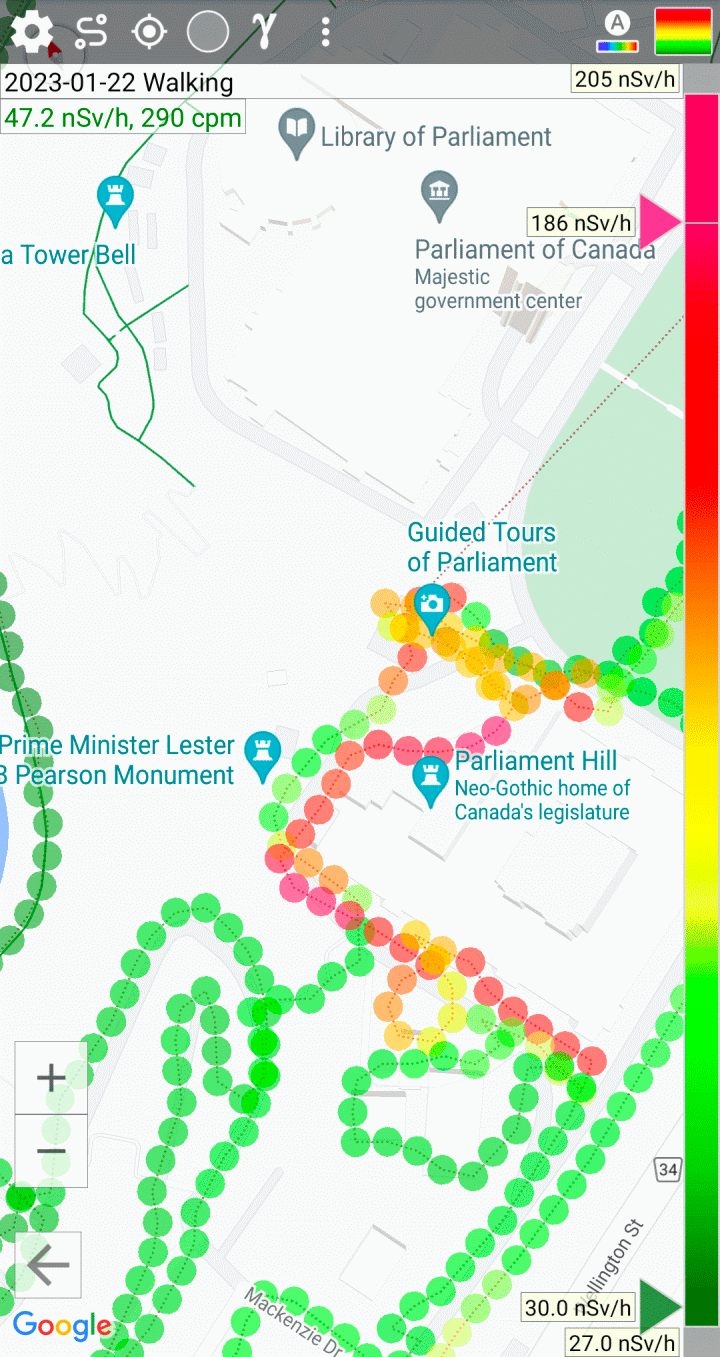
Color scale
The color scale provides a quick method to color the track points, clearly reflecting the changing emission situation. By adjusting the scale sliders, you can set the minimum dose rate or count rate value, which corresponds to the violet color, and the maximum value, which corresponds to the red color:
This example demonstrates that the entire range of measured values is approximately 40 to 77 μR/h. The purple slider is set to 40.5 μR/h, so all points with the same or lower dose rate will be purple. The red slider is set to 77.2 μR/h, and all points with the same or higher level will be red. Points between 40 and 77 μR/h will have intermediate colors, ranging from violet to red. In the map settings, you can select a color palette to display markers.
In the map settings, you can enable the automatic coloring of markers according to the current maximum and minimum measured values.
Attaching images to track points
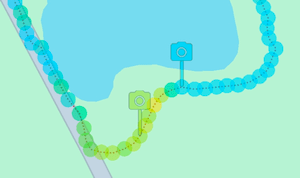
Besides the entire track, you can attach images to individual track points. Attached images are indicated by a camera symbol:
There are two methods to attach an image to a point on a track:
- Take a photo with the camera. The picture will be attached to the last point of the track.
- Tap a point on the map. A drop-down menu will appear, allowing you to attach a picture to that point.
Tap the camera icon to open a drop-down menu for image manipulation.
Updated: Jan 9, 2026